Astronomers at the Ruhr-Universitat Bochum (RUB) have incredibly busy these last five years photographing the sky night after night in order to search for objects with variable brightness and in doing so they have compiled this amazing 46 billion pixel photo of the Milky Way making it the largest astronomical image of all time:
Milky Way viewed at 5 kpx
The Milky Way is so large the astronomers had to subdivide it into 268 sections, photographing each Continue reading →
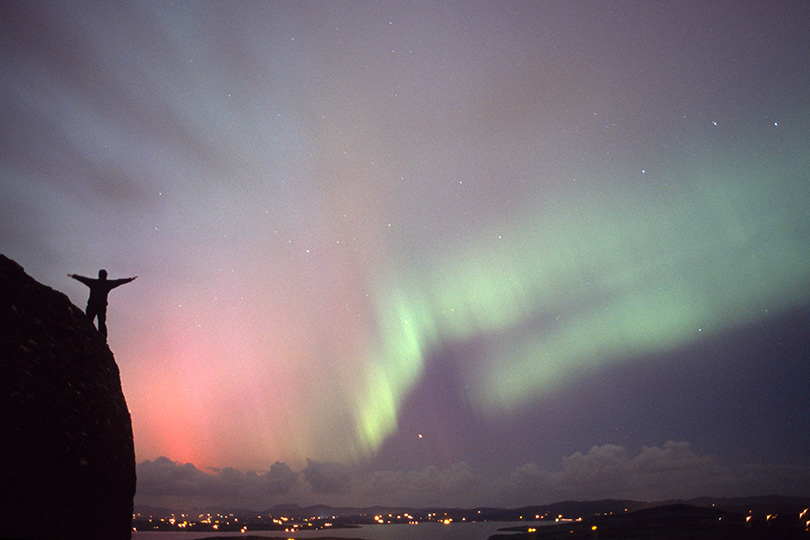
The increasing popularity of aurora photography in recent years has produced some stunning imagery from unlikely latitudes. However all is not as it seems. There are implications for the wider integrity of photography.
We’ve all seen those images over the past few years (popping up in our Facebook feeds or in the media) depicting spectacular displays of the Aurora Borealis or Northern Lights from Great Britain, Ireland or the lower 48 in the US. Regardless of the location, they’re pretty amazing images. But beneath the wow-factor and thousands of ‘likes’ and ‘shares’ lurks a nasty little integrity issue. These aurora images may be photographic eye-candy, but many of them are pure high fructose corn syrup.
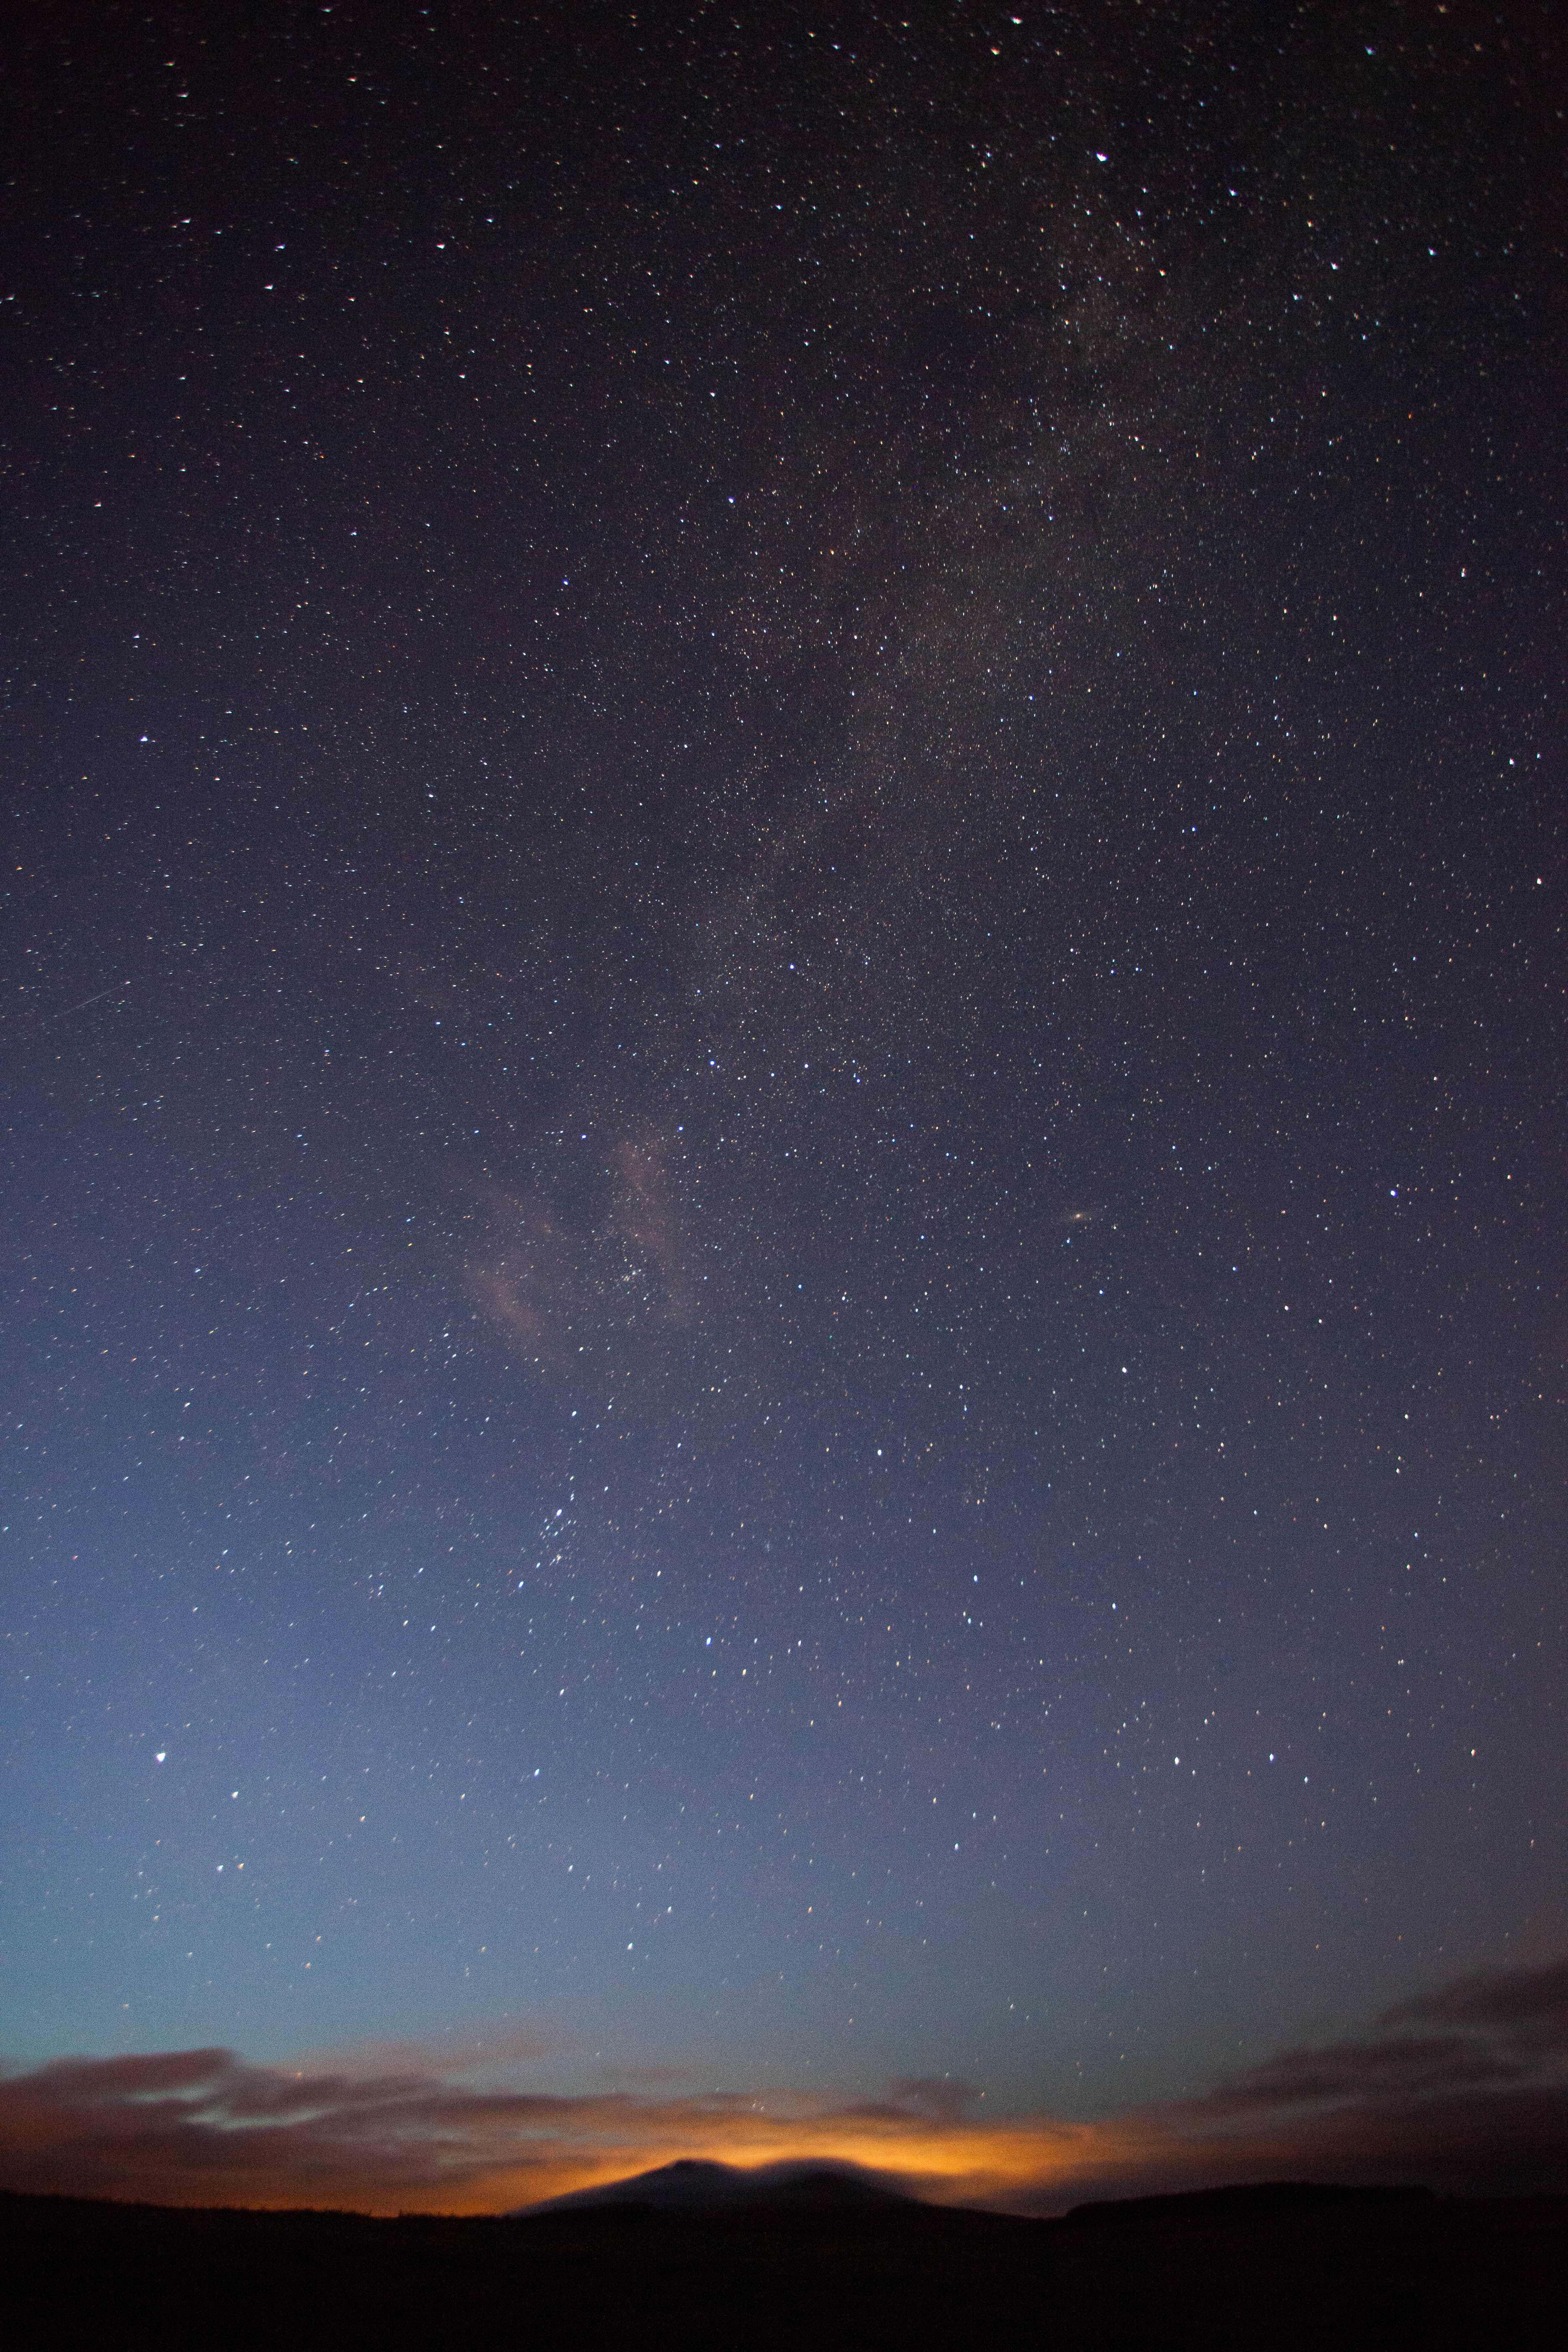
Northern Lights as seen from north coast of Ireland in 2004. Fuji Provia 400F with exposure of approx 40 seconds.
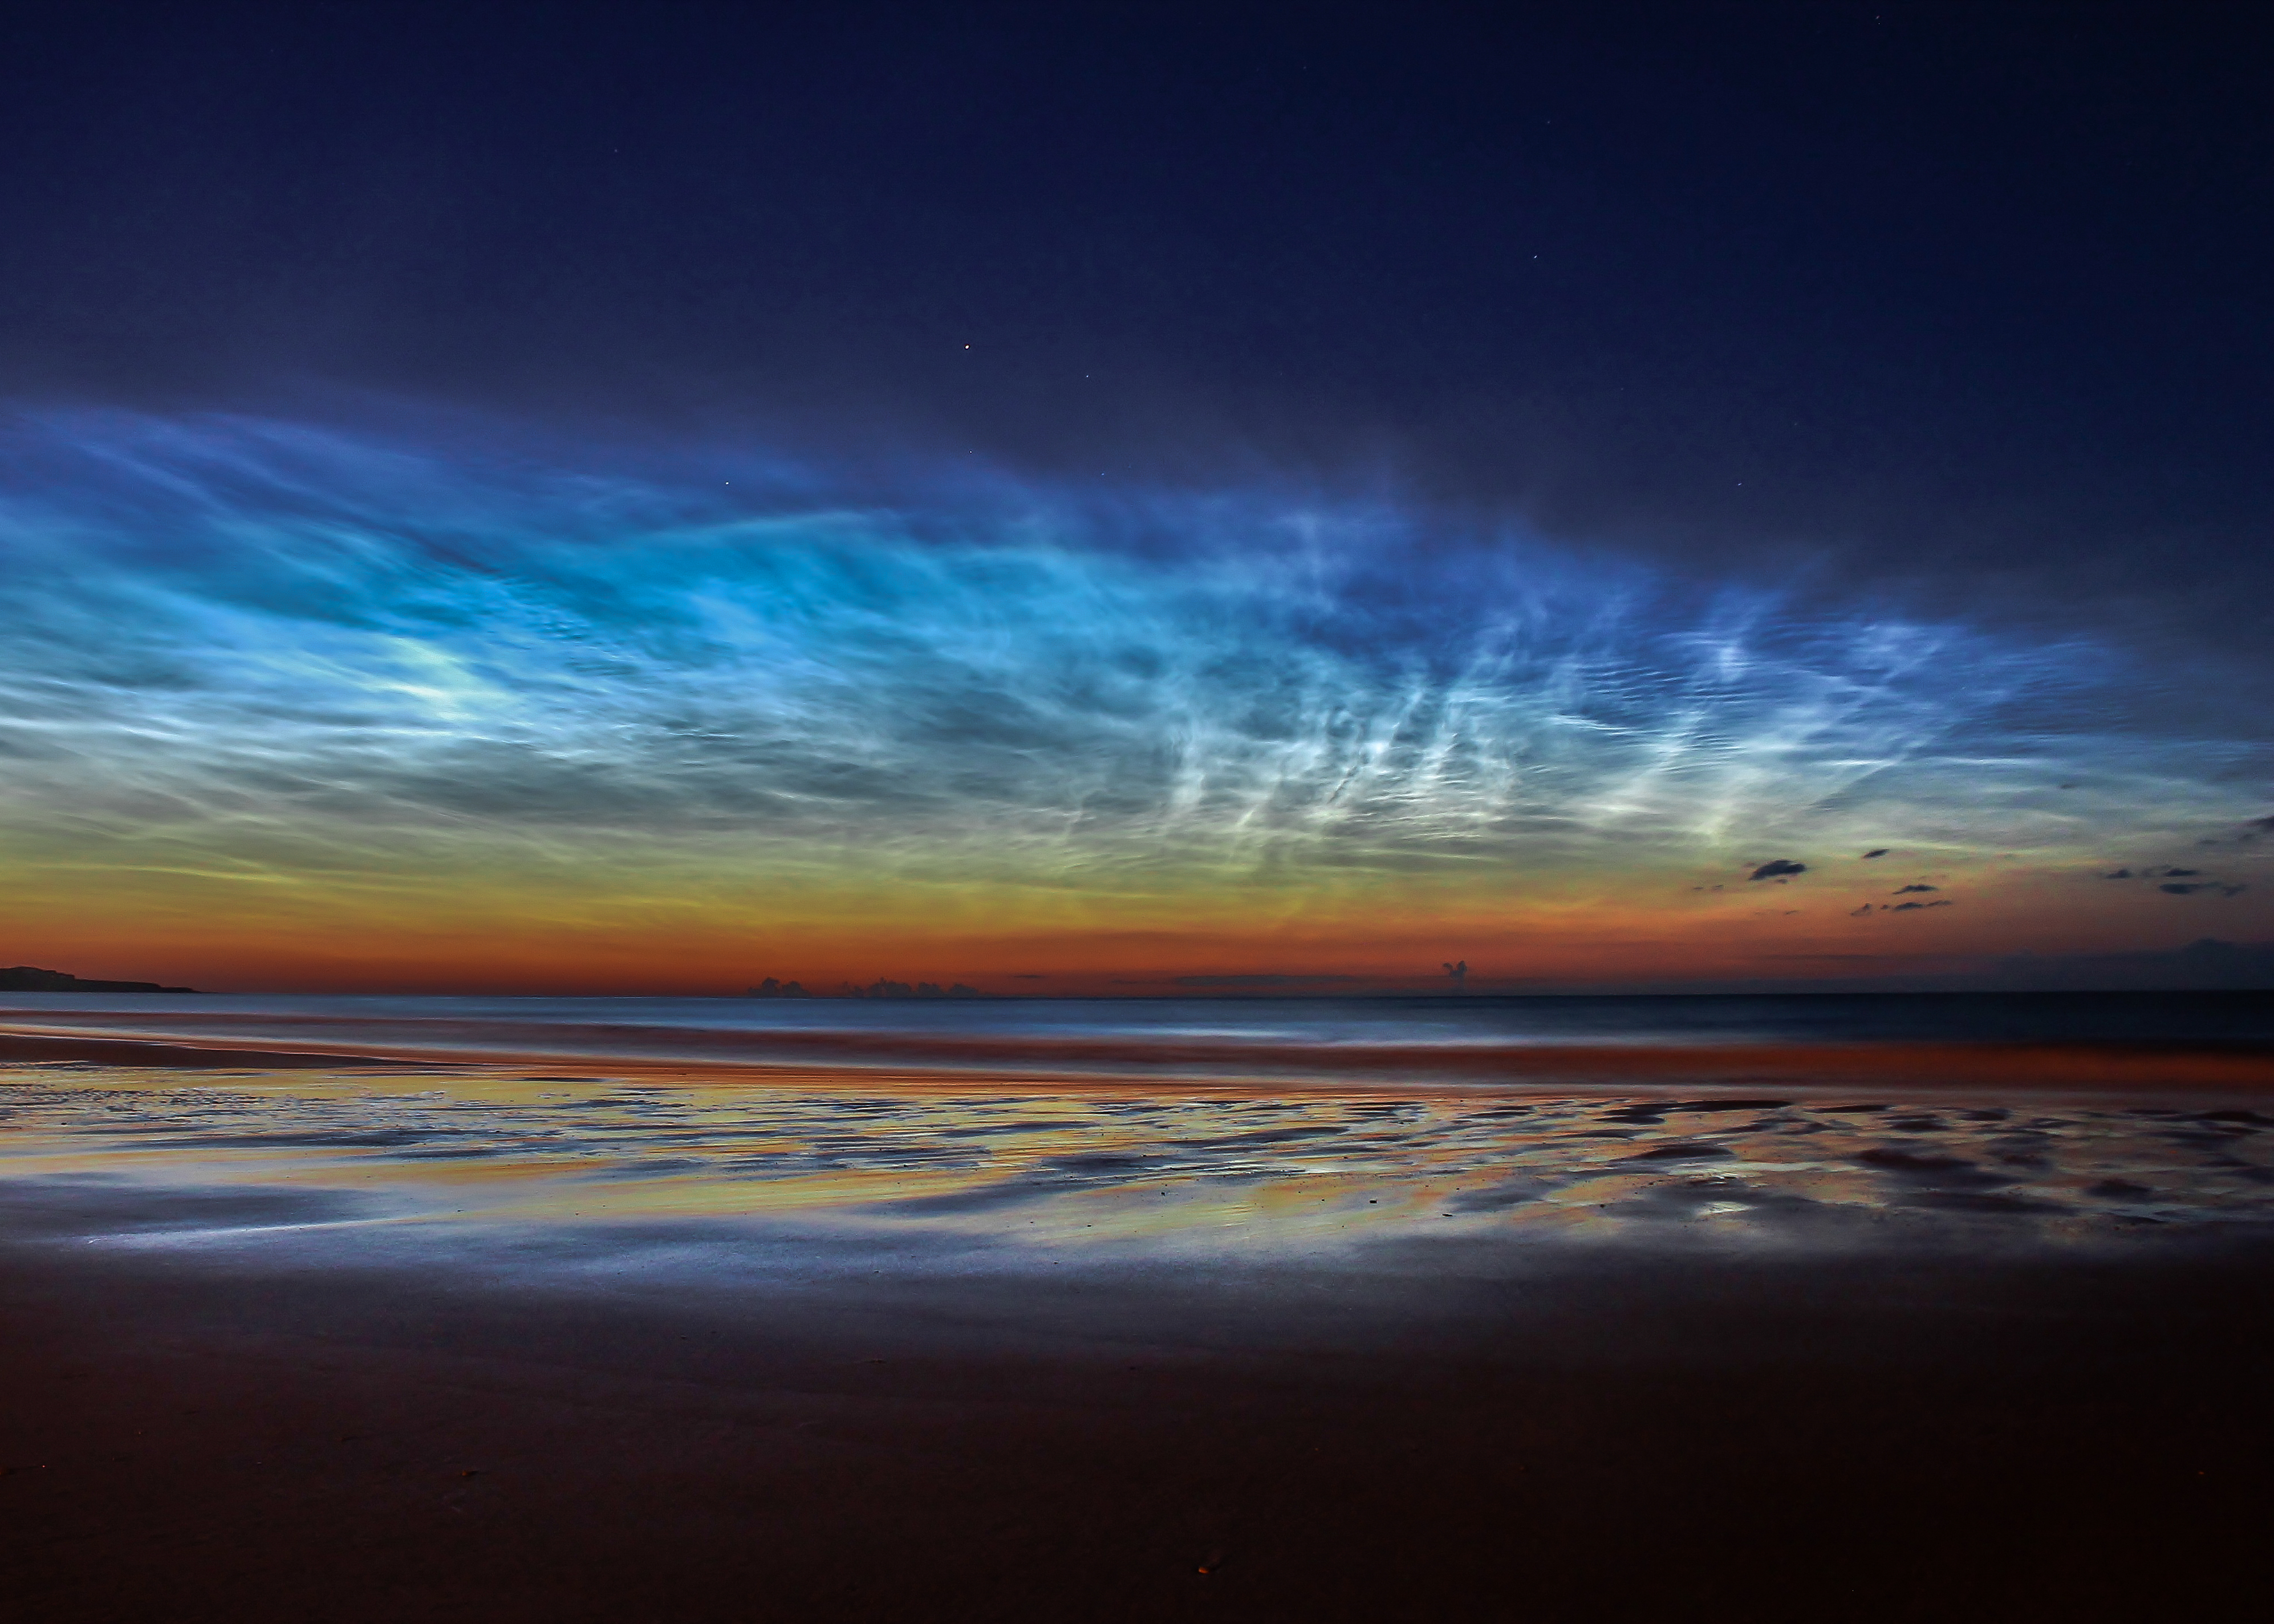
The extraordinary progress in digital photography has galvanised a revolution in night-time photography. Only ten or 15 years ago, really good photos of the Aurora Borealis or Milky Way were pretty scarce. A majority of photographers wer Continue reading →
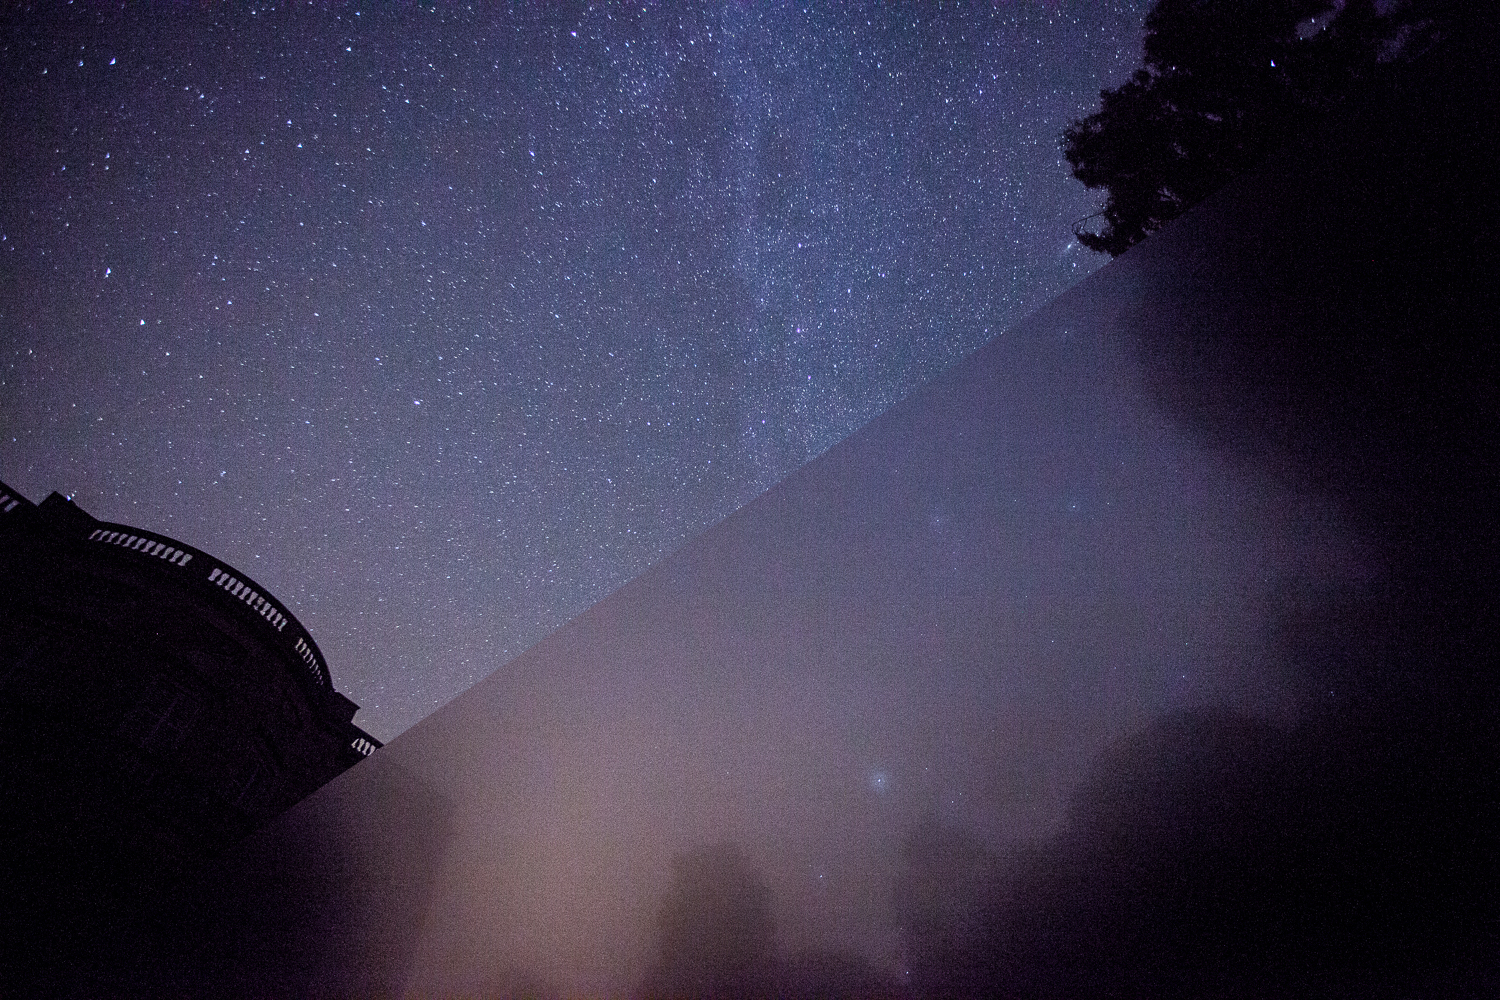
At one point or another, every astrophotographer will experience the dreaded lens dew while taking photographs of the night sky. They’ll be minding their own business trying to capture meteors, beautiful Aurora Borealis displays or just a simple time lapse when a layer of moisture appears on the lens glass and turns every captured image into a blobby mess.
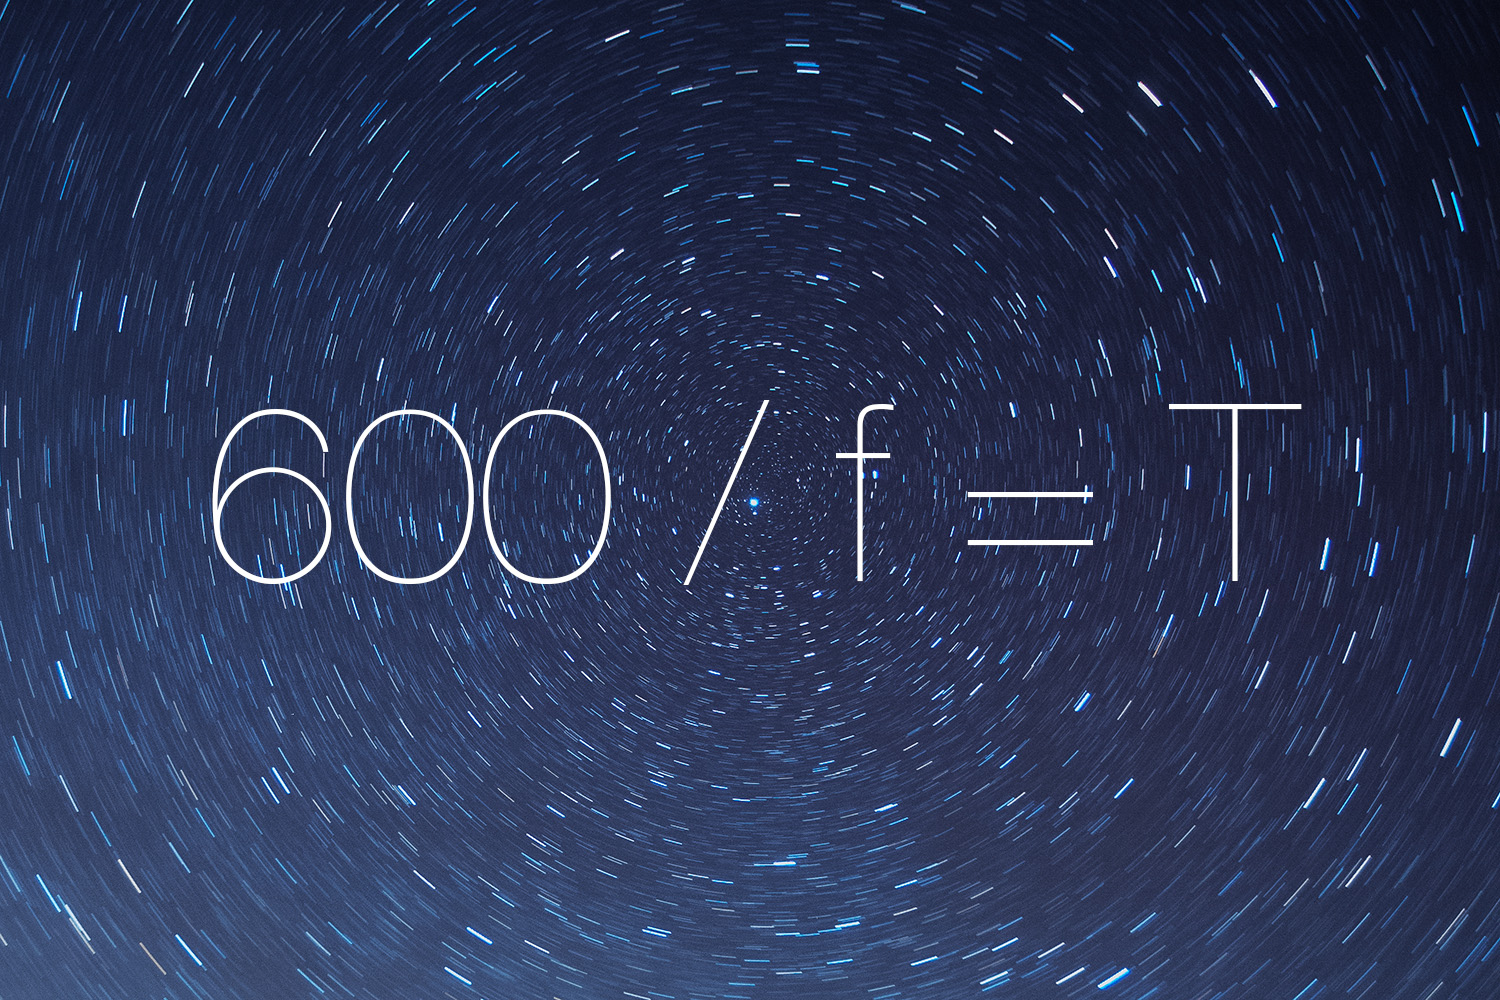
Getting to grips with astrophotography seems like an incredibly daunting task. Not only are you faced with the challenges of finding the right location, right time in the Lunar cycle and difficult weather conditions there’s also the added pressure of how to use the camera equipment you own. Thankfully there a few useful tips available that teach us some simple tricks for catching the perfect star shot. This equation below is known as the ‘600 Rule‘. So what’s it all about?
If math wasn’t your strong point at school, the mix of numbers and letters can seem quite daunting. It’s actually a very simple equation that can be explained quickly.
600 ÷ focal length of lens = exposure time
600 divide the focal length of your lens gives you the maximum exposure time time before stars start to appear as trails. For example, if you’re using an 18mm lens, you can apply the rule to learn that any exposure time over half a minute will most likely result in star trails.
600 ÷ 18 = 33 seconds
The primary function of this equation is to prevent those pesky star trails from appearing on your photographs. If you stick to the rule you can be pretty sure that you’re safe from any movement in your image. However if that’s what you’re after then you’ll know how long to wait until trails begin to appear – Rules are made to be broken, right?
5Dm2, f/4, 17mm, 30 second exposure: No Star Trails.
The more seasoned photographers will spot a flaw in the rule when it comes to determining your optimum time. Different camera bodies introduce a couple more sets of variables to the equation; the sensor size & the image size. Furthermore, stars that appear further from the the North or South poles move quicker. The ‘600 Rule’ is specifically aimed at full frame cameras with image size of around 21Mp, ie the Canon 5Dm2 shooting 30 degrees above the horizon.
The alternative rule some people use for a 2/3rds size sensor or APS-C which would apply to budget Canon and Nikon models would be the ‘400 Rule’, however for the point of simplicity your exposure time will still be roughly correct.
We hope that has made a bit more sense to you and given a renewed sense of urgency to get out there and shoot the night sky. If not, you could always try to take photographs of Space from your kitchen table…
Have you ever heard how the location of a photograph can automatically give you the WOW factor? Well in Cassini’s case, the far flung spacecraft that’s been exploring Saturn for the best part of a decade has just that. It is absolutely relentless at sending back images home across 80 minutes of Space. Take a look at this universally stunning abstract NASA released on June 22nd.
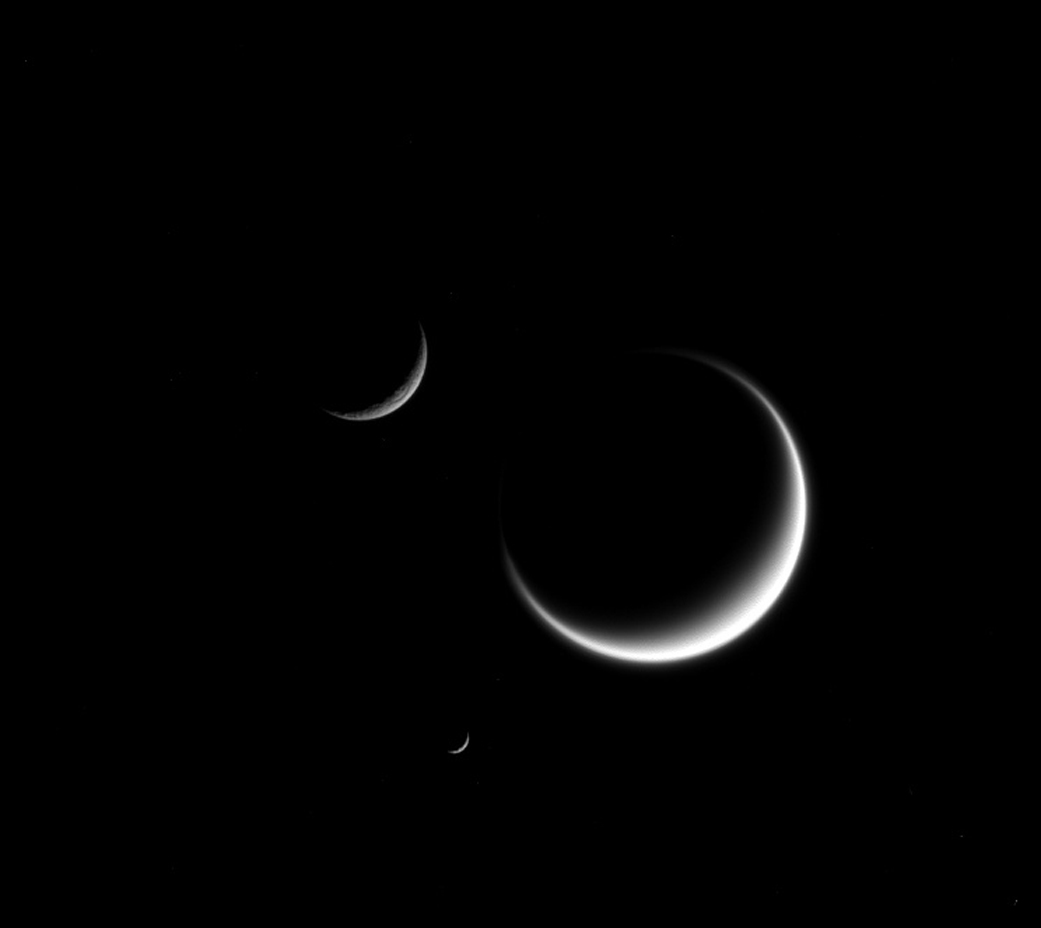
Although the image speaks for itself, NASA as usual gives some great scientific details about the supposed conjunction occurring:
The three moons shown here — Titan (3,200 miles or 5,150 kilometers across), Mimas (246 miles or 396 kilometers across), and Rhea (949 miles or 1,527 kilometers across) — show marked contrasts. Titan, the largest moon in this image, appears fuzzy because we only see its cloud layers. And because Titan’s atmosphere refracts light around the moon, its crescent “wraps” just a little further around the moon than it would on an airless body. Rhea (upper left) appears rough because its icy surface is heavily cratered. And a close inspection of Mimas (center bottom), though difficult to see at this scale, shows surface irregularities due to its own violent history.
Cassini is no stranger to mixing science and art. Four years ago Chris Abbas compiled all of the travelling photographic Spacecraft into a masterful time lapse. It’s certainly worth watching again.
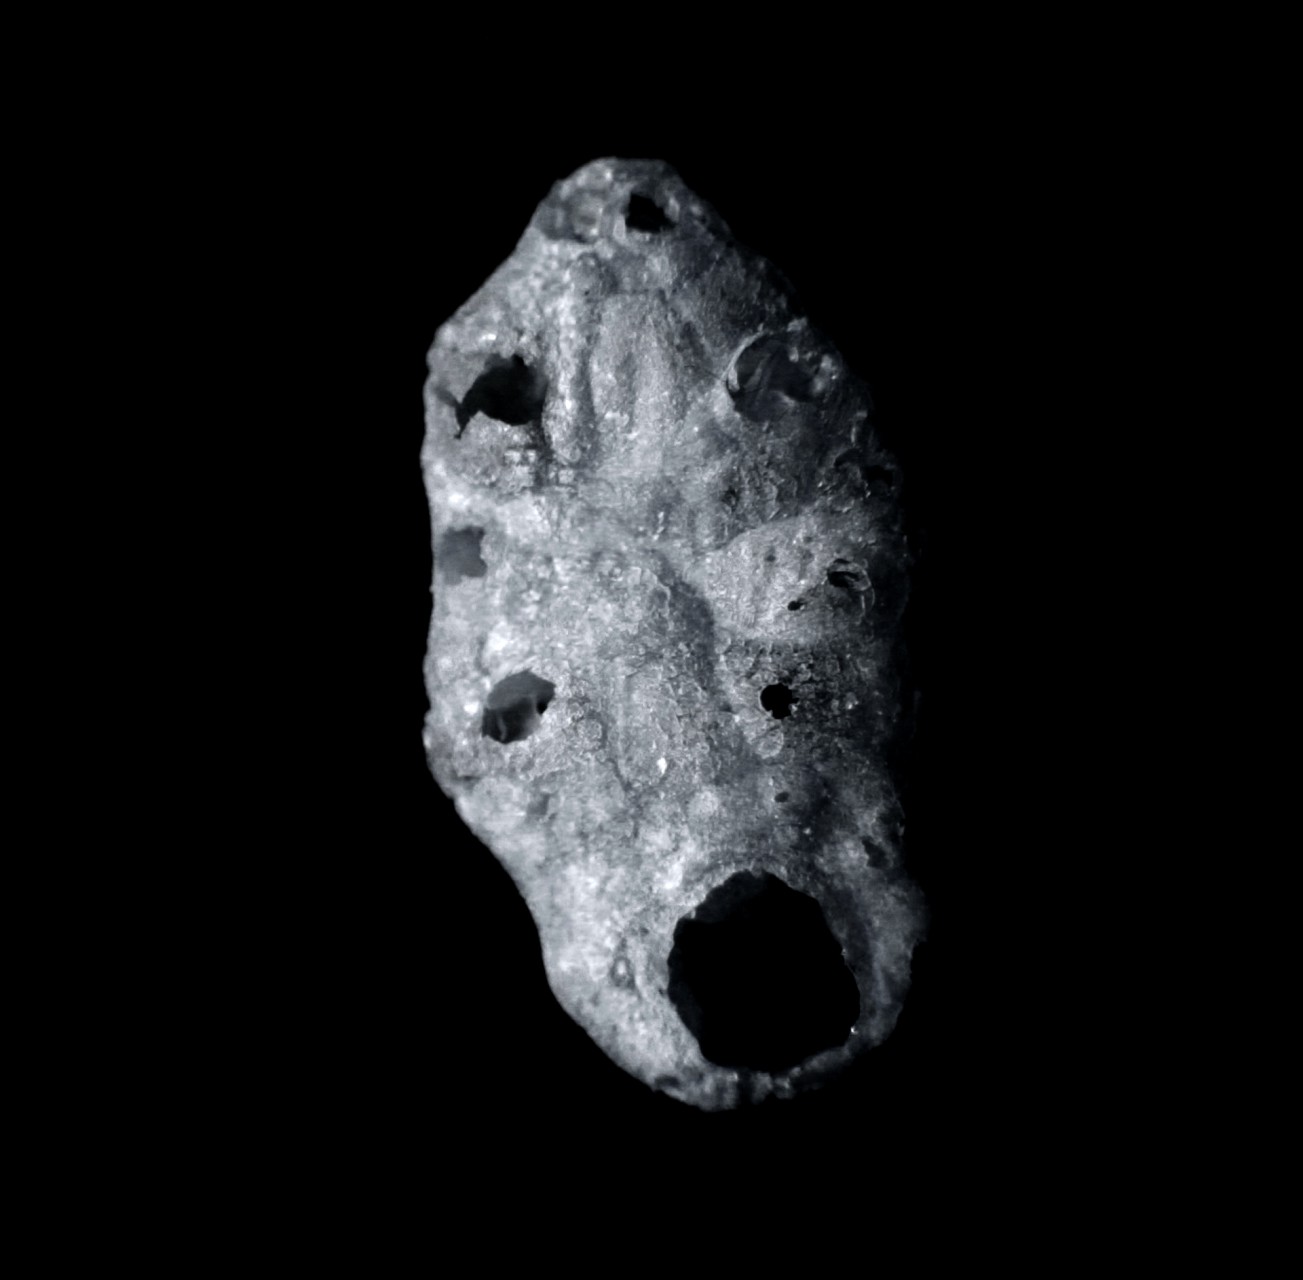
One look around Emily Scaife’s website is all it takes to see that this photographer is full of great ideas. Scaife uses photography, film making and illustration in her work and she has an extraordinary skill in turning the seemingly mundane into a visual delight, creating optical illusions by isolating her subject matter through either a macro lens, microscope or scanner and tricking us into thinking we’re looking at something entirely different. My favourite of these series are the ‘Cosmic Crispies‘. Scaife has given them the byline ‘Meteorological breakfast’ and they certainly make a wonderful feast for the eyes:
By photographing them in black and white against a pitch black background she makes them snap, crackle and pop in our brains as little asteroids (we’ve seen this type of imagery coming back from NASA – they’re not cheating and using Rice Crispies too are they?!). They are fascinating to look at and compare, who’d have thought each Crispie would be so different?
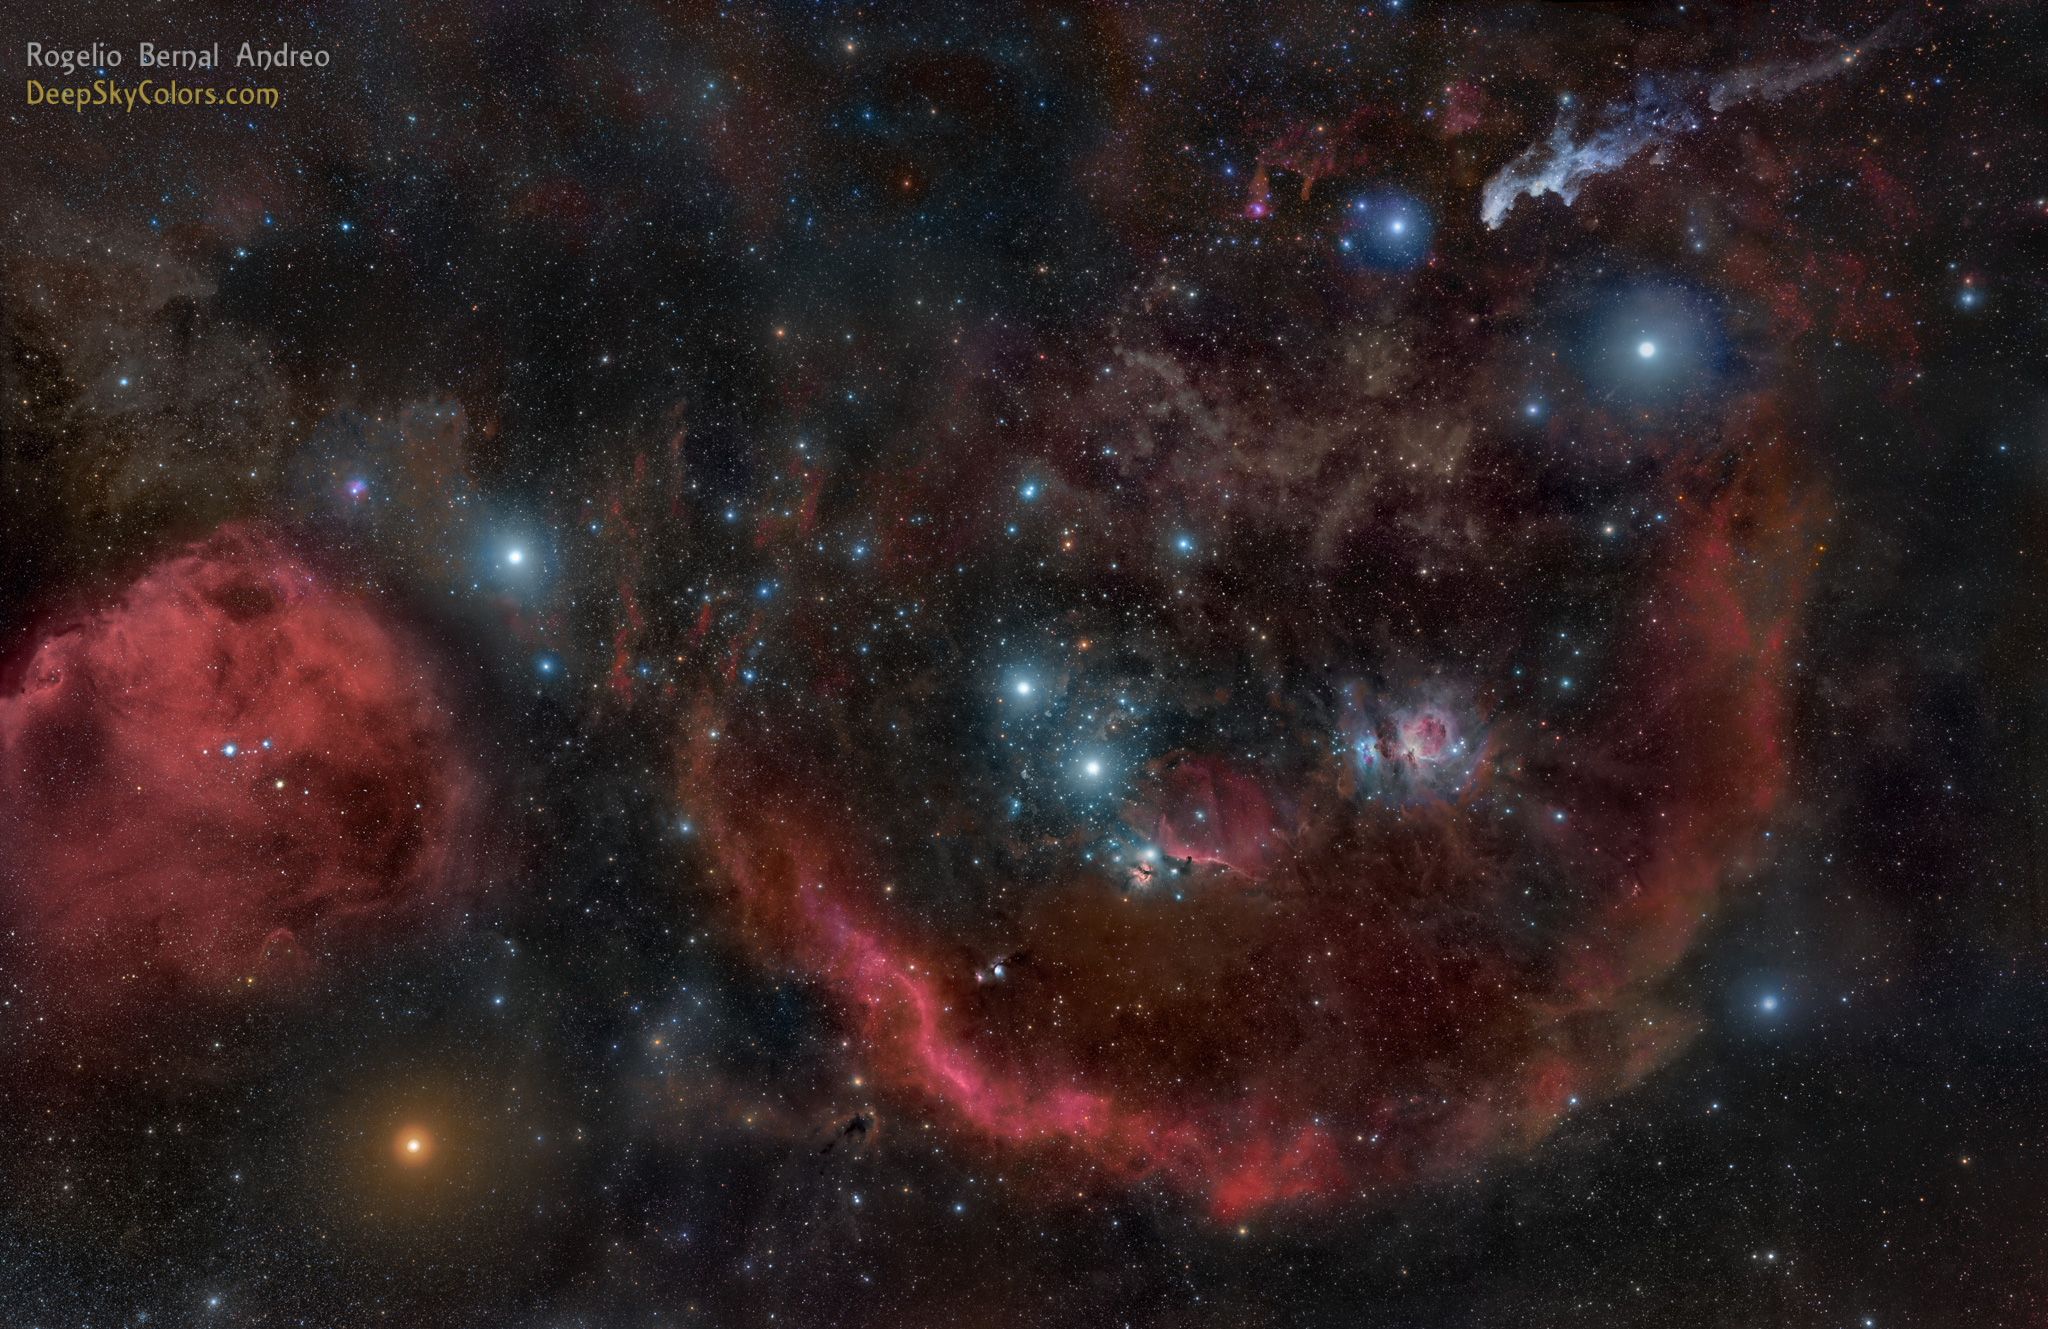
With no less than 33 images attributed to him on Astronomy Picture of the Day Rogelio Bernal Andreo is one of the most respected astrophotographers on the planet. In fact, his images are so beautifully clear, it’s hard to believe he’s taking them from inside our atmosphere.
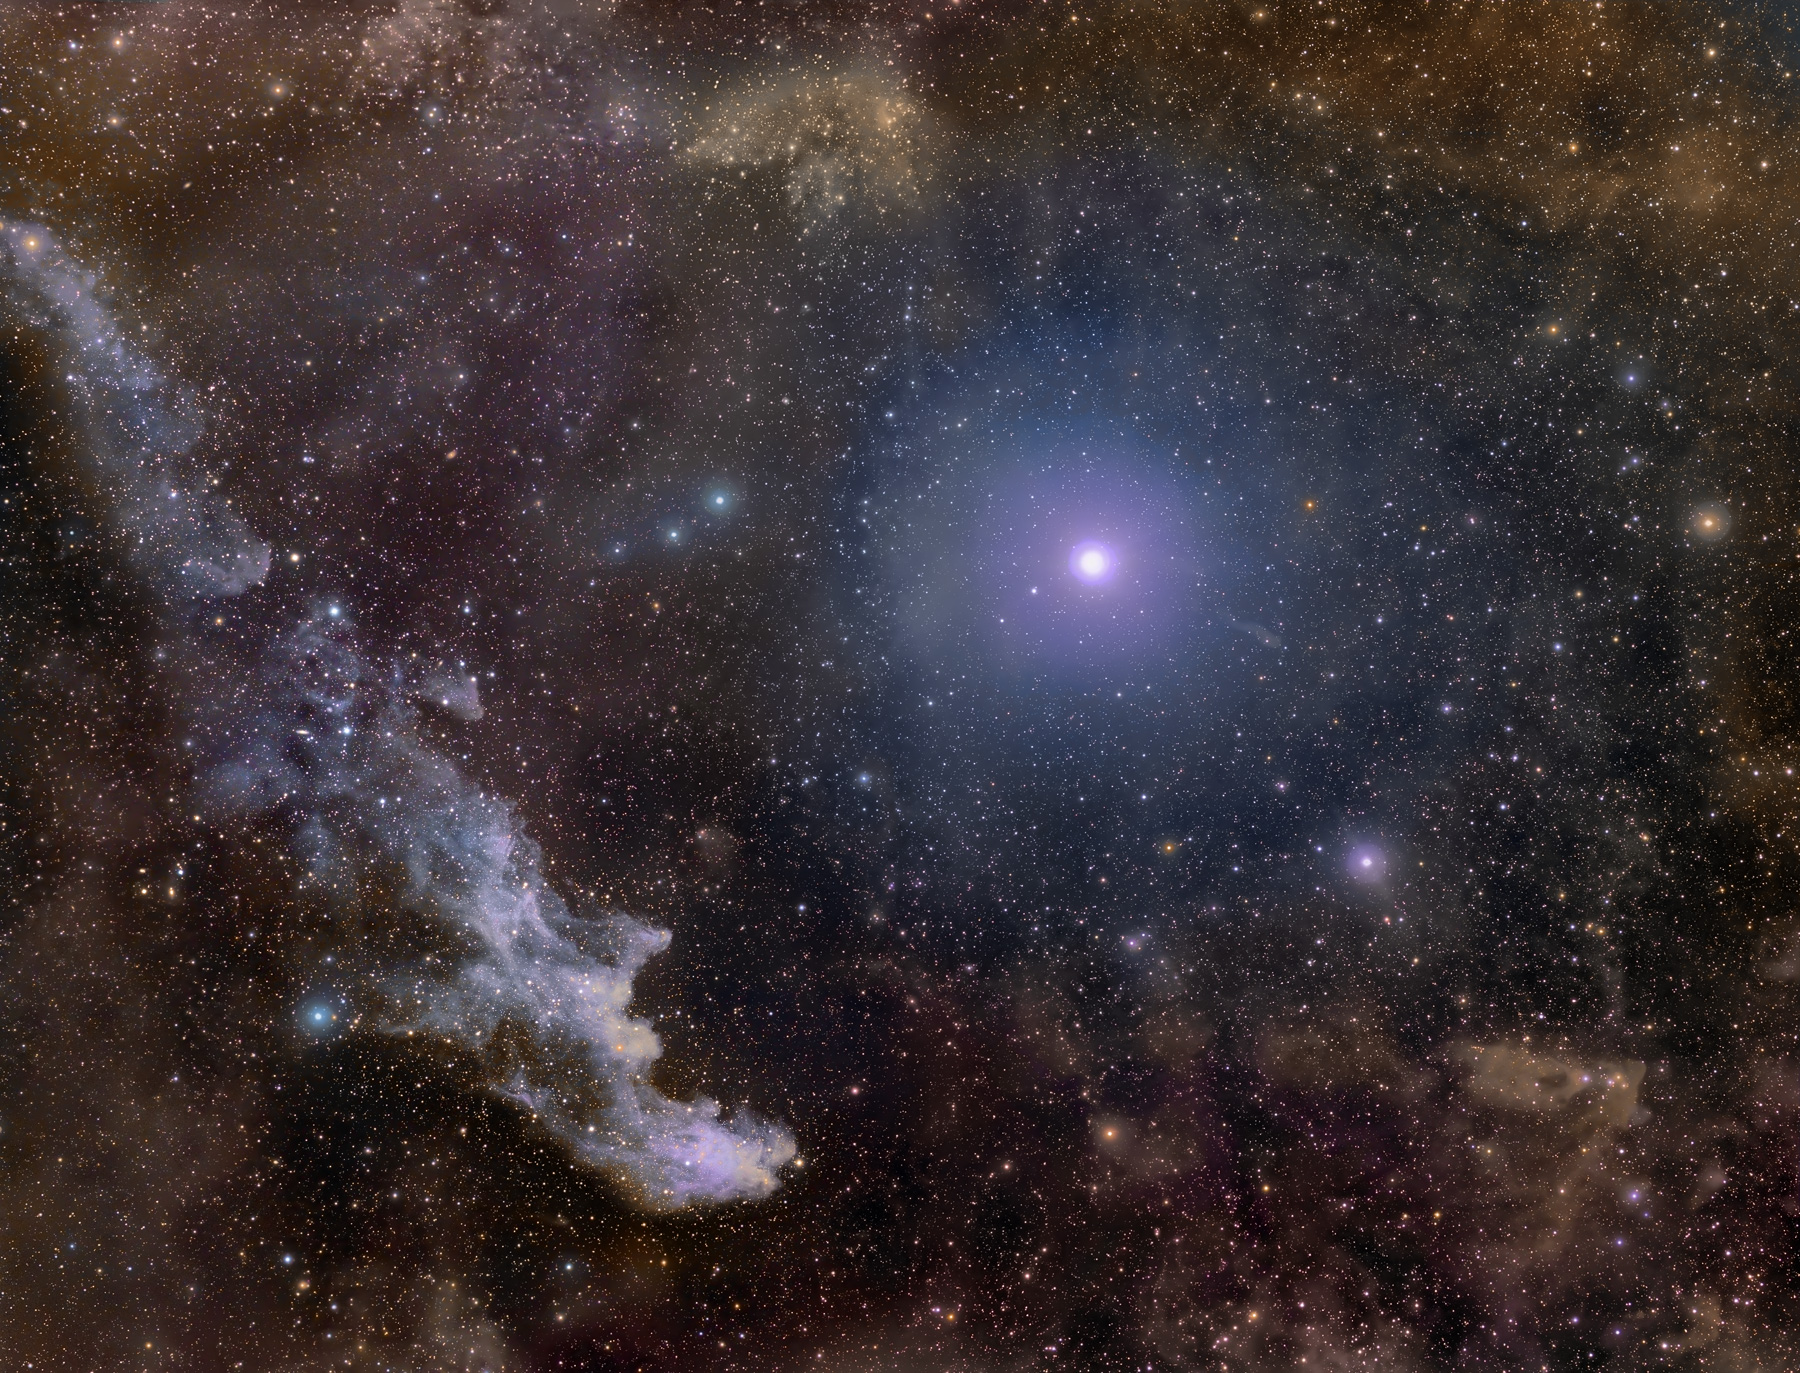
Recently this image of the constellation Orion has been receiving a growth spur and deservedly so as a meticulous amount of work was required to capture it. Amongst other things you can see the Witches Head nebula, the Flame nebula, the Horsehead nebula, Barnard’s Loop, the Running Man nebula and of course the Orion nebula. It is, as anyone in the Northern hemisphere will recognise an absolutely enormous part of the sky and to have such an incredible amount of detail there is breathtaking.
Orion Constellation | Rogelio Bernal Andreo
Of course you can’t see these gas clouds with the naked eye, although you would have some limited success with Orion’s nebula found in the middle of the sword with a pair of binoculars. To bring out more detail Rogelio made use of a narrow hydrogen alpha-filter and exposed for a total of 28 hours stitching together 32 images. Take a look at a detailed section of the top right revealing the ever spooky Witch Head nebula.
Witch Head Nebula | Rogelio Bernal Andreo
Rogelio began his astrophotography career like many of us; experimenting with is DSLR camera. Rogelio calls this his ‘introductory stage’ and has since moved on to dedicated CCD sensors to capture his images of the dark skies. Don’t worry though, ‘RBA’ as he’s known online still uses his DSLR to compose magnificent landscapes.
Take a look at just a small selection from his incredible portfolio starting with this stunning image of Simeis 147 and its surroundings. Continue reading →
This DIY rig and some free software is all David Schneider needed to detect a known exoplanet.
Just five years ago NASA launched the Keplar spacecraft into orbit at a cost of $600 million dollars on a quest to search our Milky Way galaxy for signs of exoplanets, or planets orbiting stars other than our own. In November, amateur astronomer David Schneider managed to detect one in his back yard using less than $500 of DSLR equipment. In fact, he didn’t even use a telescope.
Schneider, also a senior editor at IEEE Spectrum like the rest of us thought that only hardcore astronomers using expensive imaging and radio equipment had the tools to detect exoplanets. That was until he came across the KELT-North project by Ohio State university. whereby a group of students who had repurposed a CCD sensor to a high end camera lens and were able to detect several previously known exoplanets. With the amateur astrophotographer in mind, Schneider challenged himself with visualising an exoplanet with standard camera equipment.
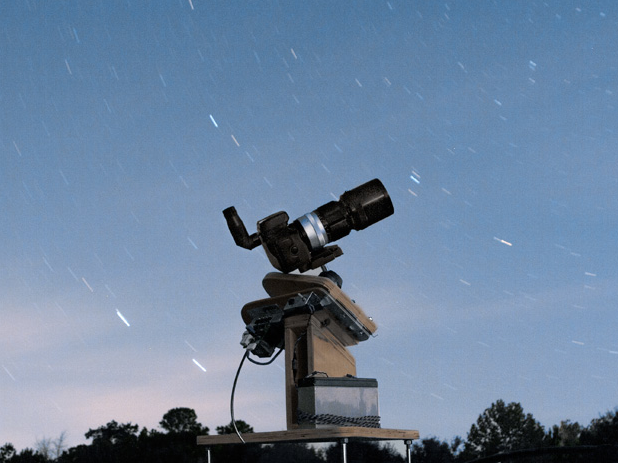
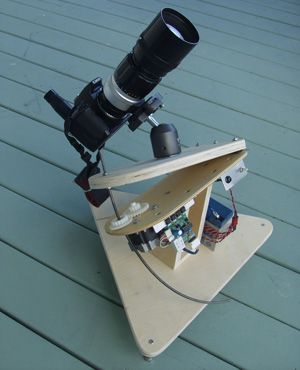
Apart from requiring a standard sky tracker mount – An electronic geared system that guides your camera along the equatorial, thereby following the night sky – which would cost anywhere between $100-$1000 the only tools needed for the job were a DSLR camera, tripod and telephoto lens. What makes this even more remarkable is that Schneider used a $72 Nikon lens, with a Canon convertor ring to do the job – Heath Robinson or what?
Schneiders DIY Exoplanet Detecting Kit
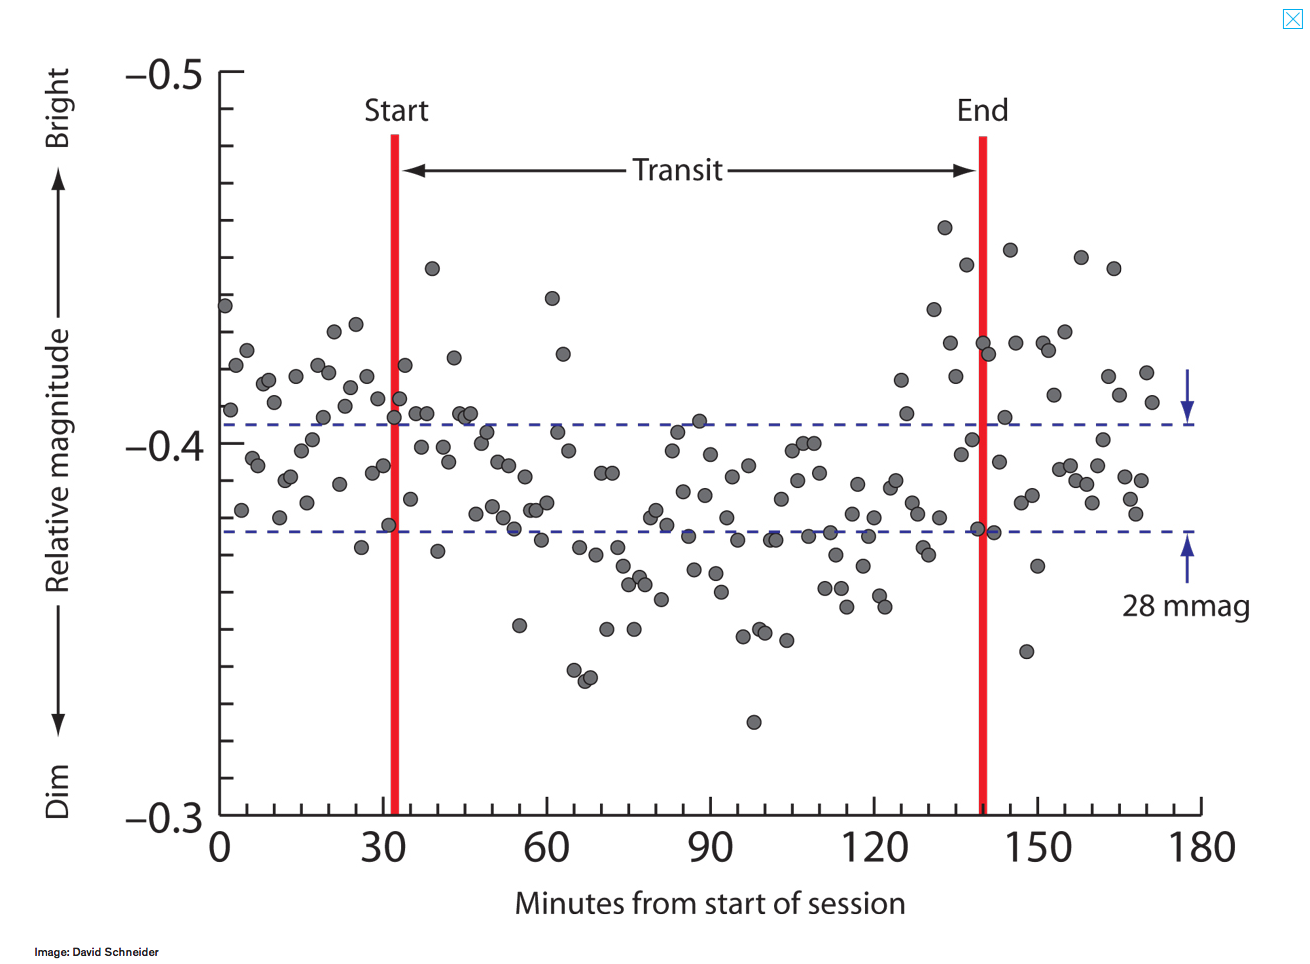
The star chosen in question was HD189733, known to home a massive Jupiter sized planet that orbits the star once every three days. Perfect for this experiment. What Schneider would be looking out for is the transit period, where the planet passes in front of its home star thus causing a dip in brightness. This is known as transit photometry, the most commonly known way to discover exoplanets.
The dip in brightness is unfortunately too insignificant to visualise in a pair of photo frames, not to mention the many variables that would effect any attempt at detection this way, so Schneider downloaded some free software to automatically analyse the different frames taken which revealed, as expected a transit period of about 1 hour and 48 minutes. The data visualised into a photometry chart reveals, with no stretch of the imagination a dip in brightness. We are sure that if the experiment was repeated several times the curve would only get more apparent.
Light Curve Obtained during Exoplanet Transit
What I feel is most important about Schneider’s ‘discovery’ is that even though this particular exoplanet is a well known object, it proves that anybody with a camera and just enough knowledge can search for their very own exoplanets. I hope, no, I expect the first completely amateur exoplanet discovery to be made soon and I believe David Schneider will be able to take some credit in that.